When you’re planning to install grass on a bare property in Queen Creek, Arizona, consider synthetic turf instead of natural grass. What’s great about synthetic-based grass is that it doesn’t need extensive maintenance and retains its appearance for a long time. Before you find companies to install them for you, it’s best to understand the general artificial turf installation process.
Below is the general process of how to install artificial grass in your outdoor space.
1. Site Preparation
The area designated for the artificial turf is prepared by marking boundaries and clearing vegetation, debris, rocks, or obstacles. The installers remove the top few inches of soil to make space for the base layers. They also remove bumps and depressions from the ground to prevent uneven surfaces that may impede the installation process.
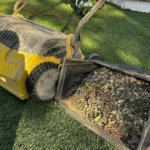
2. Base Layer Installation
A well-compacted base is established to provide a stable foundation for the turf. This involves adding a layer of crushed rock or gravel, sometimes mixed with sand, to about 3-4 inches (8-10 centimeters) deep. The aggregate base layer is then leveled with a plate compactor to flatten the surface and create proper drainage.
3. Adding a Weed Barrier
To prevent weeds from growing and penetrating through the turf, a geotextile fabric or weed barrier is laid under the sub-base. This layer also helps increase surface durability by providing additional stability to the base layers.
4. Unrolling and Positioning the Turf
The artificial turf rolls are unrolled over the prepared base. Careful placement is done to minimize seams and preserve grain consistency, meaning the grass blades all face the same direction for a uniform look. Adjustments are made to fit the turf within the designated area, with overlap temporarily maintained for precise cutting.
5. Cutting and Seaming
Excess turf is trimmed using a sharp utility knife around edges or features like pathways or trees. For larger areas requiring multiple rolls, the seams are carefully aligned and connected using landscape staples, galvanized nails, or seaming tapes. This step requires accuracy so that the seams remain invisible and are tightly bonded to prevent shifting.
6. Infill Application
Infill materials like silica sand are evenly distributed across the turf surface. They add weight to hold the turf in place, helping blades stand upright and providing cushioning. They also improve the artificial turf’s overall appearance and functionality.
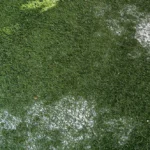
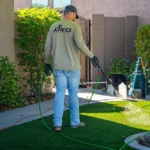
7. Power Brushing
After the infill is applied, a power broom brushes the turf fibers upright and evenly distributes the infill. This step helps achieve the desired look and performance by making sure the infill settles correctly within the base of the fibers.
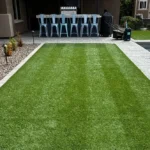
8. Final Inspection and Cleanup
The final outcome is thoroughly checked to ensure proper installation. Adjustments are made when necessary, and any excess debris or materials are cleared from the site. This final step signifies that the artificial lawn is ready for use.
Remember that even the highest-quality synthetic lawns still require cleaning and maintenance. Leave it to Dino Turf in Queen Creek, Arizona, to provide you with professional solutions. Give us a call to book our cleaning services or learn more about our multi-step cleaning process.